-

-

Saturday, December 14, 2013

Endless Hot Water Anywhere? How About My Bath Tub in the Middle of Nowhere?


I got this tub off the sidewalk when a friend's neighbor tossed it out during a remodel. It had no feet. But I didn't care, I had a plan that it was perfect for.

There are a few luxuries in a dreary Oregon winter that make life really sing for me: A well stocked pantry, a place to sleep well and warmly and a good hot bath in a big tub.

Up 'till now I've had to settle for the first two, but when my little outdoor water heater stopped working after years of hard use, I decided to upgrade to the next size up. 


We are not talking about breaking the bank though. The old one cost $115, the new one was $215.

The old heater was half as big and was just fine for doing dishes or taking an outdoor shower, but it put out a rather minimal amount of truly hot water, so it could never fill a big claw-foot tub with very hot water. The water would get cold faster than the tub got full.

With this new heater I can start filling the tub on a 38 degree day and have a hot, almost too hot, tub to soak in. In less than 20 minutes!


If you have ever had the pleasure of soaking in a hot tub under the stars, breathing perfect, fresh air,  you know what a great experience it is. If you have not had this experience, please do! 

Perhaps the uninitiated might think it sounds too cold, but I assure you it is only too cold for the minute it takes to drop your towel and jump in. 


Getting out is zero trouble since your core temperature is so hot you could run naked in the snow without feeling the slightest chill. You can casually get out, dry off and dress. Maybe those Polar Bear Club swimmers aren't as nutty as they seem.

 
I have done a bit of crazy looking plumbing to get the water going where I want it. It looks like this in house walls too,  but you can't see it like this.

I have done a lot of plumbing over the years and I have never looked forward to it. Just like anything I do around the Homestead it's always been several trips to the store and remembering how to do complex jobs like wiring and plumbing just about the time I finish the job.

This time I used PEX tubing for the first time and I used SharkBite hardware to connect it. I highly recommend the SharkBite joints, especially for beginner plumbers, since they require no special tools- you just shove the tubing in and it locks on. No leaks, no fuss. AND if you made a mistake you can fix it in a flash without losing any materials. With a little, inexpensive ($2.50) gadget, you can simply undo the connection and start over using the same materials! 
In order to hook up the heater to three things and still have cold water to the sink, I had to do a little thinking outside the box.


I also bypassed the old nonworking faucet on the tub and used a hose-end shut off valve to regulate the water to the tub.

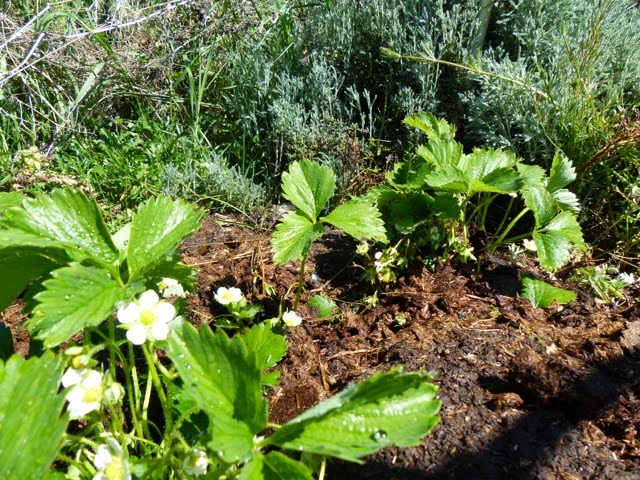
The tub was pretty dirty from sitting outside. But it cleaned up well. I had a little visitor before I got it running.


To cover the overflow hole, I screwed a canning jar lid and a gasket to a board on the backside.

This bath's outside, who cares if it overflows? And that Mod enables me to fill it to the brim. Luxury.


Sunday, December 8, 2013

 
Hello everyone at Pets Lifeline,

I have been meaning to send photos for so long, but now I have finally managed to gather some at the same time that I have a second to sit and type. And in fact, I am typing rather poorly because Bonnie is sitting on my laptop.


We love her very much and she is getting used to the cold weather but is still not super fond of the Oregon rain.


She is getting very good at coming and "leave it" and can almost be trusted around the chickens.
 
She loves to run on the farm and is so fast even my daughter's puppy, Max, can't catch her. They have become best friends.


We go on long walks looking for mushrooms or just to get some air


and she is always game for a little ball play.

She Loves wrestling with Jasper and Max for hours.
 

and when that stops being fun, they all lay 
together on the bed and chew deer antlers together.

Thank you to all of the staff and volunteers at Pet's Lifeline for making it possible for Bonnie to become part of our family. She brings joy and sunshine everywhere she goes. Your hard work makes a real difference in the world!


Friday, November 15, 2013

Propagating Some Berries


Despite the fact that Winter is about to start in earnest, be assured Summer is coming. And just like dreaming over seed catalogs can make the cold dark times pass more easily, so can the the knowledge that the new berry plants you put in the ground this fall (for free!) are going to gift you with their treasures for years to come.
Fall through early Winter is a great time to divide and transplant perennials and berries and this is why;

If you plant in the spring you will have to wait for the soil to be dry enough to work. If you dig when the soil is wet you will destroy the soil structure, especially if you have clay soil. Planting in the Spring means waiting for the weather to improve and forces your berry starts to lose a good month of time to get established. Also, by that time the plants are already growing tender shoots and root hairs which will be bruised and broken by the time they are dug up, potted, transplanted or otherwise handled. Setting them back even further.

Because of this, I find berries are easiest to divide and transplant when they are about to sleep for the winter. They have fewer tender leaves and larger root balls and if I divide and plant a month or two before the hard freeze, they can get their roots settled in and they are much less traumatized than they would be in the spring. Of course there will be no real visible growth but as soon as the barely warm, early spring hits they will burst into action, making more roots and then top growth. They will start growing the very second that the weather allows.

 
And the best part about planting in the Fall is that you don't have to worry about keeping them watered. Nature does all the work. Unless, of course, you live in a very low rainfall area, then you will need to keep the transplants well watered until they get a root mass large enough to sustain the plants.
 
Raspberries are pretty easy to propagate and transplant since they spread by fairly shallow, long roots that travel under ground and sprout several new plants called "suckers". You can divide clumps of Raspberries but it is much easier to just dig up suckers.
Heed my warning in my post about planting raspberries in a garden or flower bed where you have other things planted. When it comes to Turf Wars, Raspberries will win.

Raspberries took over my Blueberries a couple of summers ago. I have dug them all out of the area since then and put the babies into pots and gave them to friends.

 
If you have baby raspberries taking over an area, this is a great time get all those suckers dug up and to move them to a better spot. What is a better spot? In all my years of growing raspberries the one bed that has been the very best behaved was one that was planted in the corner of the lawn and was isolated by the regular mowing of the grass that surrounded the bed.


Marion Berries are hands down the number one favorite berry in our family and it is for one single reason.
File:Marionberries (2493507934).jpg

It makes the best jam you have ever tasted. Buck makes batches of jam every year and, unlike other jams, we never have any to give away. We eat it all.

Marion berries are a large, juicy and tangy sweet variety of Blackberry that was developed in the 50's here in Oregon. It's flavor is far superior to any other blackberry I have ever tasted. The vines have some nasty thorns so you don't want to plant them by a walkway or play area. 

The vines are easy to control though, unlike the raspberry because they propagate by "Tip Rooting." The very tip of each vine will grow roots and become a plant. If you keep the tips from touching the ground, Marion Berries will pretty much stay where you put them. To keep them from touching the ground, the long canes are rolled into loops and fastened to a wire stretched between posts.

 
Its pretty easy to start some new Marion Berry babies by putting a vine tip into a pot and setting a rock on it. Let the summer pass and you will have a rooted plant in a pot! How easy is that?
When the plant is firmly rooted, just snip the old vine near the new plant and either plant the new plant or keep it in the pot, but be sure to put the pot where it will get watered until you figure out where you want it.


Strawberries are also easy since they send out long "Stolons", fleshy horizontal stems which sprout baby strawberry plants at each node along the way.
 
 
Strawberries hate being planted too deep in the soil. They like to sit on top of well drained soil with their crowns high in the air. So it is much easier to keep them alive if you direct the runners to where you would like the new plants and pin the Runner down with a rock or garden staple. Once the babies get a real root ball, at the end of the summer or the next spring, you can cut the runner and leave the babies where they are or dig them up to move them elsewhere.
If you move them, take care to plant them the same depth they were growing at, and be careful to account for fluffed up soil which will sink down after a few waterings.  If the roots are exposed after watering add a little compost to cover just the roots, not the crown. Then mulch well to protect their shallow roots. They're called "Strawberries " for a reason after all!

Tuesday, November 5, 2013

Three Bags Full


You might remember my "Divide and Conquer" post where I put in this herb bed. Since then it has really done well!


 These herbs all grow really well in the rocky, well drained soil that we have and the fact that I keep throwing horse poop in their general direction does not seem to hurt their feeling at all.

I have two kinds of oregano: Golden and Italian. Their flavor is pretty much the same, so the only reason I have two kinds is because I love the way they look next to each other.
The bees love their small pinkish blooms and I cannot bear to cut them down until the weather turns cold and the bees are staying in the hive. When I do cut them, I try to do it on a sunny day so that I can keep the cuttings and dry them for winter cooking. Underneath the tall stocks are the tiny leaves of next summers Oregano. 


Also needing to be tidied is the Rosemary bush which sends out long branches in all direction each summer.


Some of the branch tips get pushed into soil for rooting new plants. Others get dried and the needle-like leaves are pulled off the branch and put into jars and bags for the spice rack. I like to keep the woody branches to use as skewers for lamb or beef on the BBQ. And if I am feeling lazy, I just throw the whole dried branches on the coals under steaks and put the lid back on, fantastic flavor with no work at all.

The sage plant is actually pretty well behaved but she gets a haircut too. Thanksgiving and Christmas need those fuzzy leaves to flavor the stuffing, baked chickens and turkeys.


I don't get fancy with drying these herbs. I just clothes pin the tops of the paper bags shut (to keep out dust) and set them a safe distance from the wood stove. The top of the fridge is a good spot too. It is surprisingly warm up there. Two weeks later they are dry and ready to jar up.