-

-

Saturday, July 30, 2011

Bees Are So Cool, Er, I mean Hot


Well, it breaks my heart to have to say this out loud but, old timers don't know everything.
I am finding it is tricky to discern what is true about keeping bees, what is outdated information, and what is just incorrect extrapolation, even if it is done by an "expert".

After examining my Hive #1 brood combs and fretting about the empty cells sprinkled around between capped cells, I read an article in the Times about "Heater Bees". There is new information out now that the cells left empty between brood cells is desirable, not the sign of a failing Queen.

Just click for a close up and personal view of the brood comb in the Women's Honey collective.
All the information in my books and on the web show photos of brood frames with empty cells as examples of poor laying patterns by the Queen. They insist this is the sign of needing a new Queen.

Now it seems all this information is incorrect.

In a study using heat sensing cameras it has been found that honey bees have specific members of the colony whose sole job is to keep the brood warm, dubbed "Heater Bees".

As if that isn't surprising enough, they have also ascertained that the temperature a larva is kept at will determine what job the eventual adult bee will perform.

The empty cells among brood, it turns out, are there on purpose so that the Heater Bees can crawl into them and warm up several other brood cells from one centralized spot.

Since the original study is in German I unfortunately cannot read or site the actual paper, but Professor Tautz has a newly translated book out titled "The Buzz About Bees: Biology of a Superorganism" that I have on order. You can check out the British newspaper which has an article on the study at:
http://www.telegraph.co.uk/earth/wildlife/7435950/Honey-bees-secret-world-of-heat-revealed.html

You can also go to Professor Tautz's HOBOS project website which is (mostly) translated to English.
http://www.hobos.de/en/teachers-pupils/about-hobos/portrait.html

Professor Tautz's work is also featured on the BBC show "Invisible World"
http://www.bbc.co.uk/programmes/b00rqgh4

Don't forget that I have been posting most of my bee shananigans on my other blog homesteader bees.  So if you are interested in the bees, check over there. I usually post there once a week.

Saturday, July 23, 2011

Bird Brains


As you might remember, Buck and I had a handmade Christmas this year and what I made was bird and bat houses out of cedar fence panels I had cherry-picked over the summer.
I had an extra bird house left over after the holidays and it laid around unloved until the middle of June when I decided to just nail it up on the corner post of the garden, not even thinking anyone would use it. The post is only 5 feet off the ground and my garden is a lot busier than, say, the 25 acres of woods it sits next to. I thought it would look nice though and I was proud of it.
About a week later I noticed a stick poking out of the door. I went over and peeked in. I couldn't see much but what it looked like was a mouse nest or something. I figured a mouse had built a nest in it while it was laying around and since I didn't think it would get used, I never checked it before I hung it up.
The next day I went to the side and opened the house to see what was really in it. Out flew a tiny bird!
Inside was a loose 5 inch pile of sticks and on top of that pile was a tiny 3 inch nest of fine grass lined with feathers.
For a couple of weeks I could not even get a good look at the birds who had made my humble box their home.
I began calling the male "Invisibird" because I would hear him making his little call all around the garden fence line but would rarely see him. When I tried to take pictures of him he was so gray and unremarkable that even my camera would not focus on him. It was like he had a super power of some sort.
As the week went on the birds became much less skittish and I witnessed the male bringing in food several times so I assume that the female is setting on eggs. I was finally able to photograph him and identified him as a House Wren. At least I think so, I'm no expert.
He is a very happy little guy and sings a lot in between getting grubs and bugs on the ground. He does this great thing with his wings that looks kinda like that trick you can do by twiddling a pencil between your fingers. You know, it makes the pencil look like it's made of rubber. He does that with his wings somehow.
He has also become very used my presence now and lets me watch his antics.

A couple of weeks ago, a pair of Violet-green Swallows decided they liked the looks of Invisibird's house. They kept landing on the roof and peering into the door.
Invisibird basically ignored them and went about his business.
I on the other hand was so afraid the Swallows would chase Invisibird away that I ran from the garden and constructed 3 more houses, which only took a little while since the measurements and construction techniques are indelibly etched in my memory, and nailed them up on the other 3 post.


There was much dithering and house inspecting by the Swallows, but they had seemed to settle on the new house on the same end of the garden as Mr. and Mrs. Invisibird.

Oddly, Invisibird was very interested in the new house too.

He hopped down the fence, singing and twiddling his wings. The swallows stood on the roof of the new house and growled at him. Invisibird just kept singing and twiddling his wings that weird way and hopped up to look inside. The Swallows were completely mortified by this little birds bad manners and complete lack of respect for their privacy and left in a huff.


Invisibird has won the other house with his odd, optomistic attitude and his twiddly wings. He has built another nest in it, presumably hoping to install a second Mrs. Invisibird in it.

Whew, what a busy guy. He now sings a little less and hunts bugs a lot more.

Later, I saw the Swallows up by the Hay House so I moved the two extra houses up to the old Cherry tree. I think it's a good spot. It has a lovely view.

Friday, July 15, 2011

Semi Low Tech Coffee Roasting- Roasting on the Cheap

It is once again time to wax poetic about coffee at the Homestead. Coffee is a big deal here and an ongoing obsession for my brain and palate. We really don't drink that much coffee, once a day, sometimes twice on those days we need to get a lot done.
But we like really good coffee and are more and more reluctant to drink substandard coffee.
Since we are conveniently located in the middle of nowhere and about one hour away from our nearest micro roasters, I am determined to master the full process of our coffee, short of growing and picking, which would be pretty tricky here in Oregon.

In the true tradition of Homesteaders, who roasted their own coffee before commercial entities came on the scene touting their vacuum packed "fresh" flavored coffee in a can somewhere in the early 1900's, I have a passion for coffee DIY.

As you may remember we do most of our coffee brewing in a stove top Moka Pot and I found a very old, hand powered coffee grinder at the thriftstore that does a very good job of getting a nice even and fine espresso grind.


For months I have been researching methods for home roasting and combing the thriftstores for a double paddled bread machine to build a roaster set up like my friends.
 
I had already ordered my green beans from 7 Bridges Organic Coffee in Santa Cruz. I chose a 10 variety 5 lb. sampler for the beginning roaster and I'm really glad I did. It is a nice assortment and it gives me a chance to mix different flavors and at least get a rough idea of what I like before I buy larger amounts. They have a great primer on home roasting coffee on their website.

While cruising the small appliances in an odd little thrift shop, I happened upon a George Foreman Jr. Rotisserie Oven.
"Hmmm" I said as I examined the vegetable basket that came with it. It was $14.99 and looked like it had been used once. My calculations for batch, bean size and temperature clicked off in my head.
This was a definite possibility. I snapped it up.

We plugged it in at home and watched the temperature hover at 325F. That is about 75- 100 degrees lower than I needed.
After a few weeks of cogitating (should I insulate the stove better or override the thermostat or...) I decided that what I needed was the additional heat from a Heat Gun, but not just any heat gun. I wanted one with variable temperature settings, not just "High" or "Low", this was a little trickier since I didn't want to spend much. Once in a while I would do a search of the internets and I could find them but they were "Professional" and cost upwards of a hundred dollars. Until one day I found for a measly 20 bucks ta da ta da da da da daaaa:

After I received it in the post, I realized that I really didn't know how I was going to get the heat of the gun into the closed oven. But where there is a will, there is a way. Or should I say where there is a drill...  
On the right hand side of the oven the rotisserie motor resides. On the left side of the oven there is just a fake plastic grill and beneath that is the metal wall of the oven. I cut out the plastic grill with tin snips and calculated the area in which the gun would not interfere with the pivot point of the basket, but still point the gun at the beans in the basket. I began drilling multiple holes in that general area. When the area had more holes than metal I proceeded to snip the metal left between the holes with my tin snips, making a ragged hole approximately the size of the snout of the gun.
I had to enlarge it a little with the tin snips by cutting little fins around the edge, which turned out to be a great thing. After I inserted the gun, I just used a little ball-peen hammer to tap the fins down tight to the gun snout. It holds it so well I did not want to take it apart to show you. You will just need to surmise what I did from the photos. If by chance the heat gun did not stay put, I was going to use a large hose clamp on the interior part of the nozzle to hold it in place.

If you use this oven method, do yourself a favor and get an Ove Glove. Blistered knuckles over ride all feelings of well being while sniffing your newly roasted coffee.


I trimmed away the plastic until the heat gun could fit all the way in. I did not want the hot metal nozzle to rest on the plastic outer body.


I pounded in the crumpled metal to hold the nozzle of the heat gun tight.


This photo shows where I settled on the heat setting- for now. This will most likely change as experiments progress.


These are the pans I used to cool the beans as soon as they came out of the oven.
Green beans


The stove is a little weird in that it has no "off" button. It uses an egg timer style knob. To roast coffee you just have to unplug it at the right moment when the basket clasp is at the front.


Unlike the Bread Machine set up, the oven lets the chaff sift to the bottom instead of flying around plugging up your heat gun intake.


First roast- a nice Viennese
Second roast- a City Roast
Roasts compared
I will not be able to give you real roasting stats for some time, but I will tell you for now that when roasting 1/3 of a pound of coffee (I am doing very small batches to get the hang of it) it takes about 6 minutes to reach first crack and somewhere around 7.5 minutes to get to City Roast +.

My first attempts have been met with very high reviews. I don't know if I hit a very good mix of Sumatra and Peruvian or if there is just no way to mess up fresh roasted coffee but I am very excited to continue the experiments. I bought myself a note book to write down the details.

Now the real fun begins!

Saturday, July 9, 2011

Homesteader Hooch

Hooch is what my Dad calls any homemade alcoholic beverage. It is usually featured in stories about my relatives. That's right, apparently I come from a long line of moonshine makers and runners.
My father, who never drinks, loves to tell stories on those who did.

I don't drink much either but a few times a year I like to have a cocktail. June loves to laugh at me or get really annoyed with me when I've had a drink.

Well, who am I kidding? I don't need a cocktail to annoy everyone.

Anyway, I decided to get in touch with my roots this winter

Saturday, July 2, 2011

Phoebe's Patented "Divide and Conquer" Method


I've decided to go with the flow this wet spring and put in some landscaping. Long wet springs are the very best kind of weather to put in trees and perennial landscape plants. It gives them plenty of time to get established in the soil without the stress of very hot or dry weather.

I have been wanting to put in an herb garden along the side of the vegetable garden but I had put it off as a frivolous endeavor until bigger projects were finished.

But the rain kept coming down and I couldn't do the big projects like fix the roof, so I started planning the herb garden, partly to keep my spirits up, partly because I had lots of horse manure to use since the weather was forcing me to keep Rio in his stall for all these cold, wet nights.

I've turned grass into garden several times and so I have a pretty good method I thought I would share.

This is my "Divide and Conquer" method


I start at least one month before I want to plant. Two months is even better. It helps if it is above 45 degrees or warmer so the worms come up and eat the buried sod.


First I mark out where I want the edge of the bed. This bed is just an uncomplicated curve, so I just did it by eye. If I want a more involved double curve I use a long garden hose to establish the line.

Then I use a nice sharp shovel to cut the entire edge. This is the "divide" part. It makes it so the grass and weeds that have runners and roots under the ground can't help the grasses and weeds you are about to bury.
 Then I turn the entire perimeter upside down onto the grass further in. This way the sod on both sections, the one you dug up and the one you put it on, get robbed of sunlight and die.
Dieing yellow sod after one week

For a couple of weeks the grass at the edges of the clumps will be getting sunlight and growing. Just go around with a shovel every couple days and cut the green parts off.


Then I pile whatever I have on top of all of it. Sometimes it's leaves or chicken bedding or wood chips. This time it is horse manure. Whatever you put, make it deep enough that the grass underneath can get no sun at all. Stomp on it so it's packed down and it will kill the grass even faster. If it is dry out, water it well and often. This will accelerate the rotting of the sod and encourage the worms.
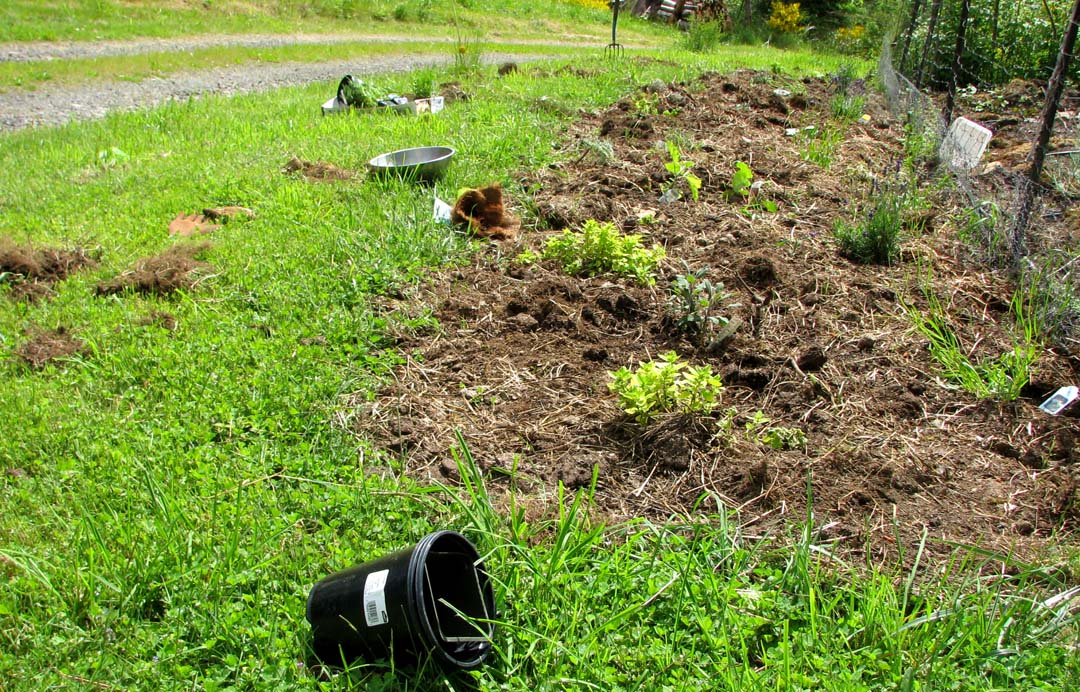
You can see I only dig the perimeter of the bed. I just kill the grass in the middle with thick mulch. This cuts the work of starting a bed into a very small effort.


Then I let the worms and nature do their work.

Meanwhile I source my plants. I hit all the Big Box stores before they have time to stress the plants- like as soon as the truck gets unloaded.
Then I fill in the plan with plants from the local greenhouses.
I don't buy huge plants. I get the little ones so they will transplant better and it makes the project much more affordable.
This bed design needed to be good for the bees in Hive #1, good for cooking and bad for the deer. The first two are easy, the last one is a little harder.
When I plant the perennials I have to leave some pretty big spaces between so that there will be plenty of room when the plants mature. If it just looks too spars, I put some annuals in the big open spaces. They will brighten the bed up the first year and then die in the winter. Here I added an Eggplant just for the fun of it. I don't know if deer will eat eggplant. We'll see.

One nice thing here at the Homestead is that the deer have plenty to eat and are not all that determined to eat my plants. Don't get me wrong they will and have eaten my plants, but if they have to go to any trouble to do it, they don't bother.

My main plan is to fill the bed with aromatic herbs that deer don't care for, but the bees love: different types of lavender, thyme, oregano, sage and marjoram.
For some nice bold color and an architectural element I added three rhubarb. I love rhubarb pie.
Rosemary would work too but I already have a very large rosemary plant that I use at the back of the garden. I also don't like how rosemary always turns into an ugly woody bonsai thing after 4 or 5 years of harvesting.

While designing I try to keep in mind the natural growing habits of each plant before placing it.
For instance I want the lavender to be at the back, partly because it will be the tallest throughout the seasons (not always, because oregano gets pretty tall when it blooms) but mostly because the bed backs up to the garden and no grass will be creeping in. Ever try to get grass out of the roots of a lavender without killing the lavender? It's nearly impossible. I want the lavender as far from the grass as I can get it.
The Golden Oregano on the other hand can deal with invading grass from the front. Every four or five years you just dig it up and divide the oregano, pull the grass roots out of the root ball and put some of the grass free oregano back in the ground.
 
I'm also putting in some Pinks because I got a good deal on them and the butterflies love them, as seen while I was storing my plants in the garden.
But I know the deer will most likely get around to eating the Pinks.


I put the plants, still in their pots, in the garden where I can keep them watered and fertilized with fish fertilizer until I can plant them. If I have time I repot the ones that are about to get pot-bound. That way they are even bigger and healthier when I plant them in the bed.

When most of the grass is dead and the soil is dry enough to hoe, that was about 25 days for this project, I start to work the soil and pull out any surviving grasses or weeds.
I keep an eye on the bed, pulling and digging up any stubborn weeds for two or three weeks. It only takes about 30 minutes a week. I don't plant yet because there is no use rushing to plant if I end up having to dig all the plants back up to get the last of the weeds out.

When 95% of the weeds and grass out are not growing back, I set out the pots of plants where I have been planning to put them and step back to think if I have it right.

When I am sure how I want them, I start to plant. Since they are little plants I am careful to plant them far enough apart to accommodate their full grown size. It looks funny at first with all that space between plants but they will fill in and be beautiful and uncrowded in just three years. If the empty space bothers me, I plant annuals in between to fill it up for the first year.

On the day I plant them I keep a big bucket of water and a cup with me. I put the potted plants in the bucket for a few minutes as I dig it's hole. I drain it, take it out of it's pot and place it in the soil. I water it immediately, the minute I put each one in the ground. I don't finish the row or plant one more, I water that minute.

Ever siphoned water? If you let air get into the hose you cannot siphon water. If air gets into the roots of a plant it cannot drink. It takes the plant a long time to get it's siphoning strength back if you let it sit for just a few minutes with its roots dangling in the air or dry dirt. I have planted both ways many times. Watering right away makes a huge difference.

After the bed is planted I will be vigilant and spend about a half hour a week hoeing any grass or weeds that come up when I start watering regularly. I can't let the weeds win now.
I add a layer of compost or manure to keep the soil weed free and then I step back, admire my new bed and recite the poetry of perennials:
"The first year they sleep
The second year they creep 
The third year they LEAP."

All that needs to be added now is patience. It's going to be beautiful.